EC2: Chapter4 : How to create and launch a Windows instance, in 12 easy steps
Prerequisites:
* Must have an AWS login. :) To create one, refer to General:Chapter1


Step-10: In the Connect To Your Instance wizard, click on Get Password button.

Click on Browse button and select the .pem private key you stored locally, in step-8.

Select the .pem key. Encrypted content appears.

Step-11: Click on Decrypt Password. Note down the password that appears. This is your Administrator password. Click on Download Remote Desktop File and save the downloaded application locally. This is your RDP application.

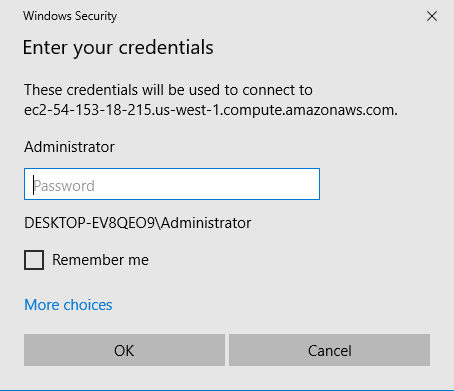
Step-12: Open the saved application file and provide the login details.

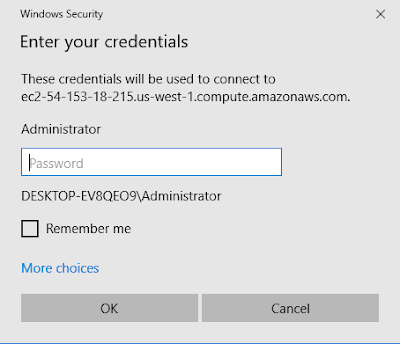
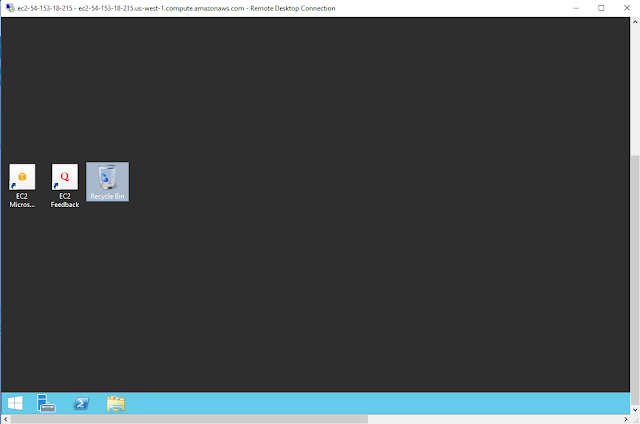
VOILA! You are connected.
Step-1: From your home page, click on 'Services' in the top left corner and choose 'EC2' under 'Compute' category.

Step-2: The EC2 dashboard appears as follows. Click on 'Launch Instance' button.

Step-3: A 7-step creation process starts. First, you choose the image for the instance you want to create. Amazon calls this, an Amazon Machine Image (AMI).

Choose a Windows AMI. For our example, I chose 2012 R2. In the 'Choose Instance Type' wizard, choose a free tier eligible instance.

Step-4: Choose default instance details.

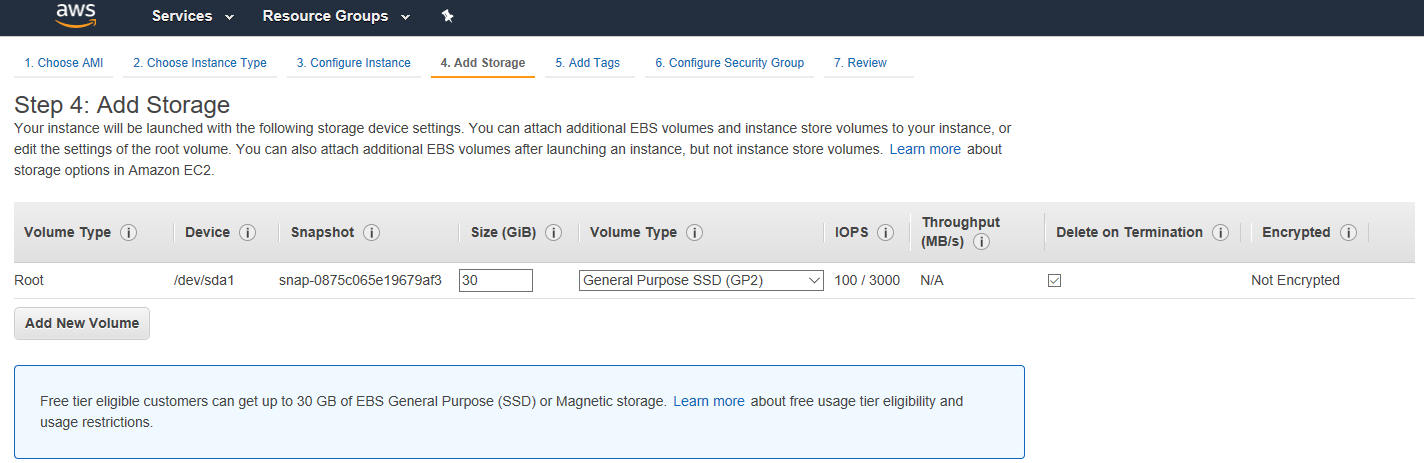
Step-5: And then choose storage. Leave default settings there too. Note that this takes 30 Gig EBS volume.
Note: If you forget to detach it when you are not using, then you will easily exceed free tier usage and may get charged.
Step-6: Choose a Tag. For my purpose of automation, I chose a tag of "Windows_Target"

Step-7: Create a security group. Or choose one, if you already created one. To suite my needs, I have created one that allows SSH and TCP from anywhere.
NOTE: Be careful and customize your security group for better security.
 Step-8: This is an important step. You MUST create a private key file and store on your computer. Without that you cannot login to your instances.
Choose 'Create a new key pair' and give it a name. Click on 'Download Key Pair' button and save the .pem file in a location you remember on your computer.
NOTE: You can use the same private key to connect to many instances. So if you have created one earlier, you can use the same instead of creating a new one.

Click on Launch instances button. Instances will be launched.

Step-5: And then choose storage. Leave default settings there too. Note that this takes 30 Gig EBS volume.
Note: If you forget to detach it when you are not using, then you will easily exceed free tier usage and may get charged.
Step-6: Choose a Tag. For my purpose of automation, I chose a tag of "Windows_Target"
Step-7: Create a security group. Or choose one, if you already created one. To suite my needs, I have created one that allows SSH and TCP from anywhere.
NOTE: Be careful and customize your security group for better security.
Choose 'Create a new key pair' and give it a name. Click on 'Download Key Pair' button and save the .pem file in a location you remember on your computer.
NOTE: You can use the same private key to connect to many instances. So if you have created one earlier, you can use the same instead of creating a new one.

Click on Launch instances button. Instances will be launched.
Step-10: In the Connect To Your Instance wizard, click on Get Password button.

Click on Browse button and select the .pem private key you stored locally, in step-8.

Select the .pem key. Encrypted content appears.

Step-11: Click on Decrypt Password. Note down the password that appears. This is your Administrator password. Click on Download Remote Desktop File and save the downloaded application locally. This is your RDP application.


VOILA! You are connected.

Comments
Post a Comment