EC2: Chapter-1: HOW to create and launch a Linux instance using Amazon EC2, in 10 easy steps
Amazon Elastic Compute Cloud (EC2) is one of the 'Compute' services of the AWS platform.
It allows you to rent a virtual machine ('instance' in AWS language) on which you can run your own applications.
In this chapter we will learn, in 10 easy steps, how to create and launch an EC2 instance.
Prerequisites:
* Must have an AWS login. :) To create one, refer to Chapter 1.
We will use our Free tier personal login to create an Amazon Linux instance preinstalled with Python.
Step-1: From your home page, click on 'Services' in the top left corner and choose 'EC2' under 'Compute' category.

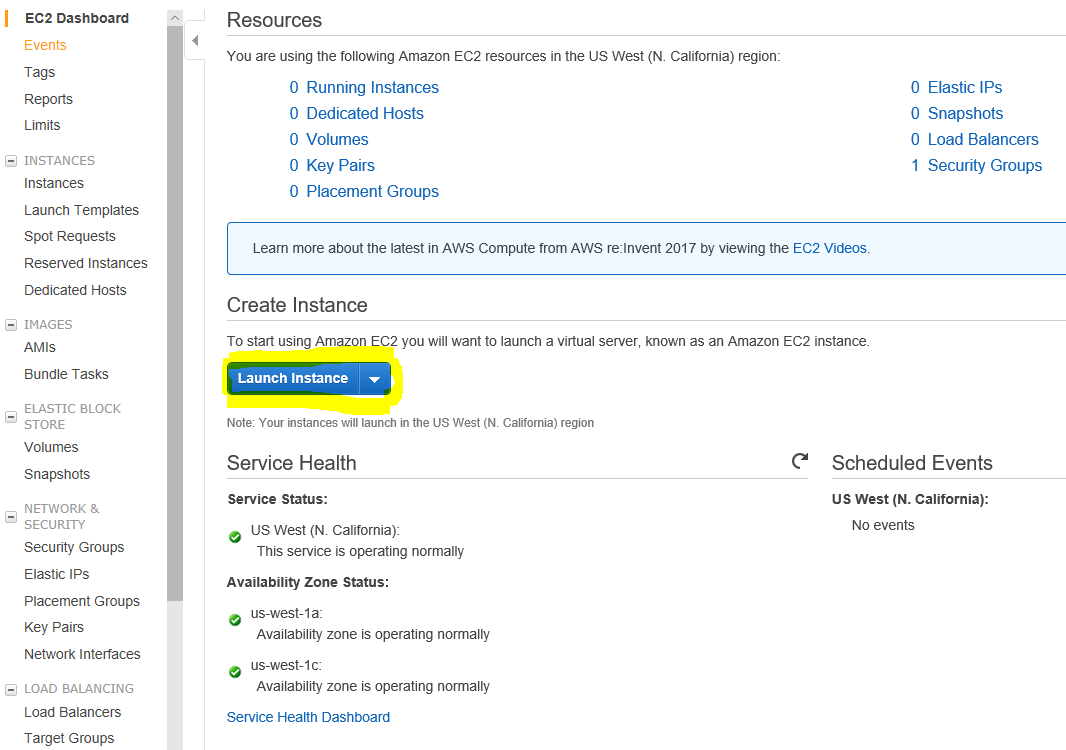
Step-2: The EC2 dashboard appears as follows. Click on 'Launch Instance' button.
Step-3: A 7-step creation process starts. First, you choose the image for the instance you want to create. Amazon calls this, an Amazon Machine Image (AMI).

For our example, we will choose the AMI for 64-Bit Amazon Linux that has Python, Perl, Ruby and Java pre-installed.

Step-4: We can now choose the instance type. These instances have varying combinations of CPU, Memory, Storage and Networking capacity. The more you need, the costlier the rent is. For our example, we will choose the instance that is eligible for the Free Tier.


Step-5: Configure instance details.
* Instances: You can create more than one instance. But remember that the Free tier allows only 750 hours per month for an EC2 instance. That is exactly a month. The more number of instances you create the more number of those hours you are utilizing. So be cautious.
* IAM role: Choose default. If you want, you can choose to give this instance the IAM role (Identity Access Management)
* Tenancy: Choose the default 'Shared' option. Choosing to host your instance on dedicated physical servers will incur charges.

Step-6: Add storage in the next step.

The types of storage available for selection are as follows. Choose default - General Purpose SSD. Free tier users are only eligible for 30GB of EBS General purpose SSD or Magnetic storage.

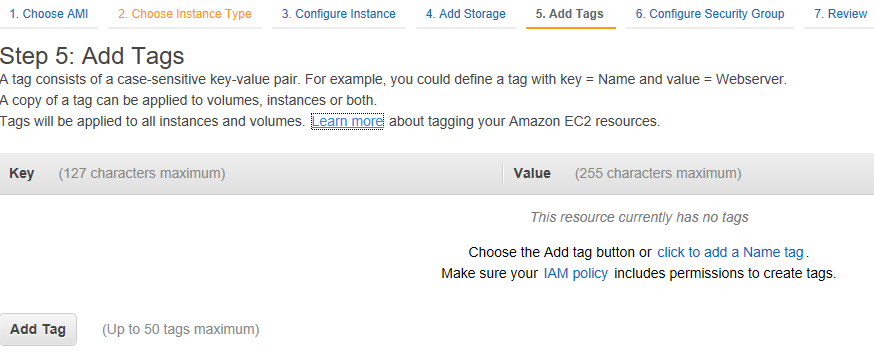
Step-7: If needed, you can assign TAGs to your resources in EC2. This is needed in case you decide to use create your own metadata to manage your resources. In our example, we are leaving default setting - no tags.
Step-8: This is a very important step. A security group for your instance is configured here. It is a set of firewall rules for your instance.
Ex: You may want to restrict all SSH access to your instance from your laptop's IP only. You can define the SSH rule as such.
For our example we are here creating a security group with the name SG_For_Linux_Instances

The available options for source are: 'Anywhere' allows you to SSH to your instance from any IP.

Step-9: Review the instance details in this page and click on launch button at the right bottom corner.

Step-10: This is an important step too. You MUST create a private key file and store on your computer. Without that you cannot login to your instances.
Choose 'Create a new key pair' and give it a name. Click on 'Download Key Pair' button and save the .pem file in a location you remember on your computer.

Click on Launch Instances button and you will see the launch status. Click on View Instances button in the bottom right corner.

You EC2 dashboard shows your instances as follows. We have the instance running.

IMPORTANT: As long as your instance is RUNNING, your 750 hour Free tier quota for EC2 instances is being utilized. So, be sure to STOP the instance when you are not using it.

For steps to connect to this instance using PUTTY, refer Chapter3. :)

Comments
Post a Comment